3/23/15

"You're a good Mother"


Let me set the scene. I’m embracing my sister in a goodbye hug after a wonderful visit. She made the trip with her husband and three darling girls and as we give one last squeeze she lovingly whispers in my ear, “You’re such a good mother”.  Now, here is when about one thousand different reasons entered my mind that discounted what my sister just so kindly stated. Fifty of those reasons happened that day alone, and it wasn’t even noon yet. 
My immediate silent protest to her remarks stayed with me the rest of that week. In fact, I seemed to have adopted more of those negative thoughts than usual.

No allow me to step back in time a bit. My many days of playing the childhood game of M.A.S.H. seemed to rub off and I got what I wanted, 4 kids- 2 of each gender, living in a house. Minus the red Lamborghini the game said I’d have, I felt pretty fortunate.
I have always wanted children and knew when I did, I would stay at home to nurture and teach them. They would be dressed perfectly every day, we would have oodles of fun cooking in the kitchen together and well, I’d be Mary Poppins, “practically perfect in every way”!
Ok, so we all know where this story goes next, a little dose of reality and 17 years later I’m yelling at my kids to get out of the kitchen and let me cook in peace!

So back to my original story. I had been feeling, more than usual, like I was failing as a mother.  I was keenly aware of the housework that was calling my name; the individual needs of each child that still needed to be fulfilled; the dinner that was not going to cook itself and the many other tasks and responsibilities that requires my attention.
Who in the heck is this Mary Poppins anyways and why was she practically perfect in every way? All I knew is that I was not living that fantasized dream. 

Then one night while eating dinner with the kids, everyone seemed to eat a little slower that night. They were talking to each other, no, carrying on a conversation! They were laughing and joking around. They even offered to do the dishes!
Scripture and prayer later that night even lingered longer than normal. The teenagers weren’t trying to speed things up and the little's were actually reading scriptures.  My teens voluntarily came and hugged me, letting me squeeze them and kiss them and they didn’t even ask me for something afterwards!

As I was taking my extremely hot shower later that night, I literally dropped the soap and had an epiphany- I felt the strong need to embrace the good that was happening in my home, to acknowledge that I was trying to be a good mom and that's all God requires of me. This is when I decided that perfectionism is absolutely an enemy to good. We are asked by God to be perfected in and through our loving Savior, not try to attain perfection on our own and in our own way.

We all want to be good mothers. We all are doing our best and however that applies to each individual, it’s still good.  Every aspect of motherhood is saturated with daily good works. Those of you are in the middle of sleepless nights; potty training; terrible two's and terrifying three's; disabilities; rebellious teens or adult children who are struggling, you are offering your good works to those children in many ways. Those good works, I believe, are counted among the angels and we are blessed because of it.  Now how often do we recognize those actions and then follow up with acknowledging the results of our actions? I believe that if we did this more often, we would all feel more of our divine goodness as mothers. I think trying to attain an unrealistic perfection in motherhood actually slows down the progress of developing good works.

“You’re a good mother”, those sweet words my sister spoke, now mean more to me than ever before.   Let us as mothers give this same acknowledgment to those mothers around us. May we see the good in their actions and may we tell each other more often, “You’re a good mother”. We all want to be good, we all want to do good, and that is good enough.
So embrace your goodness, your divine role, and acknowledge the fact that YOU, are a good mother!


1/28/13

Easy Organizing Solution's

Store your winter Gloves and Hats !
Hangs on the back of any door


.
I found myself not wearing all my jewelry because It wasn't in eye's view. I don't have a lot of closet or wall space for some of these cute organizational ideas i've seen on pinterest so I had to get creative. Certainly not as pretty as some of these things ive seen but- it works and I love it
You'll need:
`Mesh shoe organizer
`Glue Gun
`Clothspins


I used the last three rows of pockets for my bracelets, watches, and rings so i didnt have to do anything to those rows. 
The pockets that i used for earings, I glued the opening shut, tightening it up a bit.  
For my necklaces, I glued  clothes pins on to hang the necklaces on.


This is one for my daughter's bathroom


8/8/10

72 Hour Kit Ideas

1 sturdy backpack per person (or rolling suitcase), or some tupperware bins
1 change of clothes per person
1 set of scriptures per family
1 flashlight per person
batteries
small first aid kit
personal documents
2 gallons water per person, minimum
water purification method
$100 cash per family
ax/hatchet & shovel
utility knife
bucket
battery powered radio and light
small sewing kit
Food
2 light sticks
hand warmer / canned heat
prepare blankets or sleeping bags to be accessible at a moment's notice
1 small toothbrush per person
toothpaste, soap, and shampoo
silver foil emergency blankets
mosquito repellent
small entertainment (crayons, card games, etc) and paper/pencils
camp stove or portable BBQ & fuel
work gloves (2 pair per family)
mess kits or disposable plates/cups/bowls/utensils
pet supplies
candles, holders, matches
aluminum foil
can opener
disinfectant
garbage bags

8/6/10

Quick Breads

There is a BIG difference between regular yeast breads and quick breads. So of course the method in how we prepare will be different. Ok, no brainier. Then tell me why in the world people everywhere are still beating the crud out of their muffins and biscuits? At an attempt to correct this fopa, here is the proper way to make most muffin recipes.

The more you mix, the more gluten you develop in your muffin. That's not good. We want muffins to be tender and not chewy.

The Muffin Method- for muffins, duh!

#1 Stir together your dry ingredients in a bowl- sift with your whisk
#2 Combine all liquid ingredients, including *melted fat or oil in separate bowl
#3 Add the liquid ingredients to the dry(yes I said that right)** and fold the mixture only with spatula until flour is moistened. DO NOT OVER MIX- IT NEEDS TO BE LUMPY
#4 Pan bake these immediately (if recipe calls for baking soda or single acting baking powder. Double acting baking powder give you more time to get them in) Combine your separate mixtures in advance for this purpose.

*This is one of the points where the muffin method differs from the creaming method. When you add the fat to the liquid, you want to make sure that all of the liquid ingredients are at room temperature. You want the fat to be evenly dispersed throughout the batter. For this to happen, you’re going to have to have the rest of the wet ingredients warm enough that the butter won’t turn hard on you the moment you pour it in the measuring cup.
** by using low gluten flour you are again ensuring the least amount of gluten development as possible so you really are not stirring at all, in fact you are folding the ingredients together and I'm talking for like 12 seconds only. JUST until flour is coated. (have I said this enough yet?!!)


The Creaming Method- Cakes or cupcakes- coffee cakes (if you use this method on what was meant to be a muffin you will get a cupcake)

#1 Combine fat, sugar, salt, spices and powdered milk (if used) in the main bowl with the paddle attachment
#2 Cream the ingredients together until light
#3 Add the eggs in two or three stages, Cream well after each addition before adding more eggs
#4 In separate bowl, sift together the flour, baking powder, and other dry ingredients.
#5 Stir together the liquid ingredients until well combined
#6 Add the sifted dry ingredients to your main bowl alternately with the liquids. So like this:


I hope that helps, if it's confusing in any way leave a comment. And remember
DON'T OVER MIX

7/7/10

Freezing Corn on the cob


Local, home grown corn-40 Servings for.....$4

Step 1

Husk Corn and try and get all the silk off

Step 2

Bring large stock pot of water to a rapid boil...Have a large bowl of ice bath set next to stock pot...have another empty bowl next to ice bath..you need tongs also

Step 3

Add about 5 ears of corn at a time to the boiling water. Boil about 5-6 min. Remove and place immediately into ice bath. Let sit for an equal amount of time, 5-6 min. Then place in empty bowl to dry off

Step 4

Once you have blanched all your corn, you can either cut it off the cob and freeze this way, or cut cobs in half and freeze. Get all air out of the freezer bag. Having a food saver is ideal. I however, am not the ideal anything so I use freezer bags!

Step 5

Place in the freezer and enjoy all year, fresh corn on the cob!!


6/27/10

Windowpain Test

How to test your dough to see if gluten has developed.


I thought I had done this already, but here is what your dough should look like when you have kneaded it and your gluten is developed.
You cut a piece of dough, (ton't tear a piece) off and stretch it between your hands. It will be tight and if you hold it up to light you will see light shine through. Like a window pain!


1/22/10

Don't Tear the Gluten


One of the things I learned at baking school was the in's and outs of bread making. I am in no way an expert, I still learn things, however I will not forget learning about gluten! My chef actually yelled at me one time for being "too mean to the bread". Yeah.
The picture below is what a tear in the gluten looks like- you might have to click on it to get a bigger view.


Tearing will happen in the kneading process. Basically, Gluten is what gives the bread structure, how it will hold shape. It's texture, so it wont be a crumbly mess, and it's strength. Your flour type is what will determine your gluten development potential. Rice, potato, and oat flour don't have enough proteins to develop into gluten. (hence the gluten free bread section )
So when your flour meets liquid, it absorbs and then as you knead, it begins to stretch and pull in to long strands. Like rubber bands if you will. The tighter those rubber bands the better the bread.

Now when you are to rough with your bread during the kneading process, or don't knead properly, you can tear that very gluten you are trying to develop! your goal is a smooth round ball of dough at the end of the kneading. Make sense?
Hopefully it does and hopefully you can now tell others to "Stop tearing your gluten!"


12/10/09

What a year!

Well with the year wrapping up I have to say I am glad it will be over! It's been a trying one. But much to learn and being that this is the learn it love it live it page, I thought I'd just get personal and share what I have learned.
I find it interesting that when I thought about what to call this particular page, this name just popped into my head. I have to say that it is so true, for me at least, the order of this phrase. This year has been full of learning. Learning through trial seems to be the theme this year! I tend to analyze perhaps to much while going through a particular trial/hard time. I want to know not so much why, but what do I need to learn from it, how can I be better, or what is the Lord trying to teach me? It leads to much reading and praying. Like I said I probably over do it but boy do I learn a lot about myself and how the Lord works with me.
Then I realized that the more I learned the more I loved, what ever it was that I needed to Love more, I did. At times, I know this may sound nuts, but I loved the trial. I was loving that I felt the spirit more, I was loving that I appreciated my family more, I loved myself more. Love is truly the underlying answer. Love is also serving, Charity IS the pure love of Christ. So learning to serve no matter in trial or not is HUGE. I tend to get so wrapped up in my wo that I shut out the world. I cant think about others, i have to focus on me, right? So wrong. When I did crawl out of my hole and thought about others or gave service, I felt lighter and for that brief moment I forgot about my hardship. President Monson's talk this last conference was so perfect for me. I really have to work on this one.
Then there is Live it. After trying to learn all I did, and trying to love more fully, I soon found it hard to actually LIVE it. I mean, you know how you can go through a trial and then feel the relief, or feel free from it? Do we continue to learn and love like we did? How easy is it to enjoy the free feeling that we just start coasting through life again? I realized that the true test is, do I LIVE what I LEARNED?
I stopped looking at life as just getting through the trials the best I can. One to the next. Taking a deep breath when all is well and then holding it when life feels like, well you know. I look at it like no matter what may come my way, if I continue to learn all I can about the Savior and His teachings, if I continue to increase my love in all things, then I am living life. What comes my way, either bad or good, it is just another opportunity to grow. I don't mean to make it sound simple or la de da. I know that many suffer more than I ever have. But I do feel that the Lord has stretched me more this year than ever before. I have felt more pain than ever before and i have felt more alone than ever before. I know it's not easy, I will never claim it to be. I can say however, that I am just beginning to fell some gratitude for what I have been allowed to go through and hope that I can just live life the way I know I should.
I want to say again that I know there are those who suffer more than I think I could ever bare. I know the Lord only allows us to experience what he KNOWS we can overcome. And even though my trails might seem lighter than others, I have been stretched and molded just a little more.
May this year of learning, Loving, and Living continue!

~Amie


10/13/09

Stock and Broths


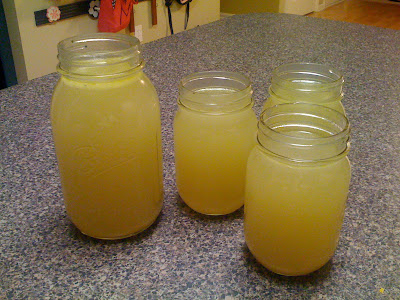
It's super easy to make a stock yourself and save money. This is a great time of year to do it, using those bones from your turkey!
This is how Alton Brown suggests to do it- It's a good one, very traditional.

Ingredients
4 pounds chicken carcasses, including necks and backs- Just use as much chicken parts as you can gather up, skin included
1 large onion, quartered
4 carrots, peeled and cut in 1/2
4 ribs celery, cut in 1/2
1 leek, white part only, cut in 1/2 lengthwise
10 sprigs fresh thyme
10 sprigs fresh parsley with stems
2 bay leaves
8 to 10 peppercorns
2 whole cloves garlic, peeled
2 gallons cold water
Directions
Place chicken, vegetables, and herbs and spices in 12-quart stockpot. Set opened steamer basket directly on ingredients in pot and pour over water. Cook on high heat until you begin to see bubbles break through the surface of the liquid. Turn heat down to medium low so that stock maintains low, gentle simmer. Skim the scum from the stock with a spoon or fine mesh strainer every 10 to 15 minutes for the first hour of cooking and twice each hour for the next 2 hours. Add hot water as needed to keep bones and vegetables submerged. Simmer uncovered for 6 to 8 hours.

Strain stock through a fine mesh strainer into another large stockpot or heatproof container discarding the solids. Cool immediately in large cooler of ice or a sink full of ice water to below 40 degrees.
Place in refrigerator overnight. Remove solidified fat from surface of liquid and store in container with lid in refrigerator for 2 to 3 days or in freezer for up to 3 months. Prior to use, bring to boil for 2 minutes. Use as a base for soups and sauces.

8/4/09

Back to School Food Menu

*This years update- I am still a fan of pre-making as much as I can like on a Saturday, and freezing it. I love taking out mini homemade muffins, sandwich and cookies from the freezer and packing it right into the lunch box. It became habit to pre- make and really saved time and money by making as much as I can from scratch, and it's healthier :) I know, I know, blah blah, blah.

Thinking about school lunch makes me sick- I definitely opt for making them. I am a big believer that food effects a child's behavior, and I want to control that as much as I can, while I can! But that is going to mean time and planning. It's a little work in the beginning of the week-but pay off during and of course the health benefits!
Treating this the same way we would the dinner menu- Make a two week lunch menu. (or a month if you wish)
I actually started by making a master list of all the different things I would put in their lunch.
Here is what I came up with to start:

Lunch Ideas
My kids have all approved these ideas by the way! Ages 11-9-5


Sandwich/main meal


Sandwich roll (they love sandwiched on my homemade rolls)

PB&J

Turkey/Ham

Mini Wraps

Pizza Bagel

Egg Salad

Chicken Salad

Green Salad

Homemade lunchable

Rice cake with peanut butter jelly on top (seriously they love it)

Spaghetti O’s

Soups

Chicken noodle

Beef stew

Tomato


Fruit/Vegetable

Grapes

Strawberries

Dried apples

Carrot & Celery sticks w/ dip

Celery and peanut butter dip

Cheese Squares

String Cheese

Diced peaches and pears

Applesauce Cups

Hard Boiled Egg

Orange slices (I peel and separate for them)

Banana (I’ll just cut in half)

Grapes and square cheese on a toothpick

(Mellon's need to be kept cool for food safety reasons)


Snacks

Popcorn

Mini rice cakes

Gram crackers, plain or w/ peanut butter

Granola bars- homemade J

Mini Muffins

Blueberry

Poppy seed

Apple

Bran

Banana Bread

Zucchini Bread

Oatmeal Bars

Oatmeal-cran scones

Cereal snack mix

Trail mix

Mini bagels and cream cheese

Chips and salsa (I put salsa in a little round tubaware)

PB&J on Ritz crackers


Treat

Cookies

Chocolate

Oatmeal

Chocolate chip

Peanut butter

Chocolate Zucchini

Brownie bites (just cut brownies in circles)

Rice Krispie Treat

Mini Marshmallows

Oatmeal Bar

Crispix bars


That for me is half the battle, then you can simply plug in the food items on your menu.
I come up with different sandwich items, fruit items, snack items and treat. My kids take a water bottle to school and switch from water and lemonade. NO CAPRI SUNS. (they rot their teeth says my grandpa for a dentist!) Plus this saves big time on buying drinks. My friend suggested this, and does it with her kidos- they love it actually because they get more in there than they would out of a juice box!
Alright, so once you have your master list, plug in your menu!


Once we have our menu, we can shop from this- buying only what we NEED, and then back to Saturday baking days. (or whatever day your choose) I will take Saturday to make the different items for the week. For example if I have banana bread, mini muffins and cookies as part of the lunch menu- I will make these, baggie them up and freeze. They are ready to pull out and stick in the lunch box! I will do this with sandwiches too. PB&J freezes great, just put peanut butter on each slice of bread, then jelly in the middle. It wont get soggy this way. And with Turkey sandwiches, use Miracle whip not Mayonnaise. Mayo does not freeze!
But I will make these up as well and pull them out that morning, they are ready to eat by lunch time! My oldest says they are perfect, not soggy!
This really does take the ugg out of making lunches in the morning and I feel better about whats going in their little bodies. For me, again, half the battle is the planning. I promise it's worth it. And for my provident living plug- This really is the smart way to do most everything in our homes, planning, budgeting, and using our resources. It is a lifestyle that creates financial freedom and joy in homemaking. It sometimes does take courage to start! But it's worth it!